The POR Details Page
Clicking on the "PO Request Number" of any POR will load its POR Details page.
Tip: The clickable "PO Request Number" can be found at multiple places in the Mr.Albert POR interface. Eg. PO Requests tab, Approvals tab, filtered search results etc.
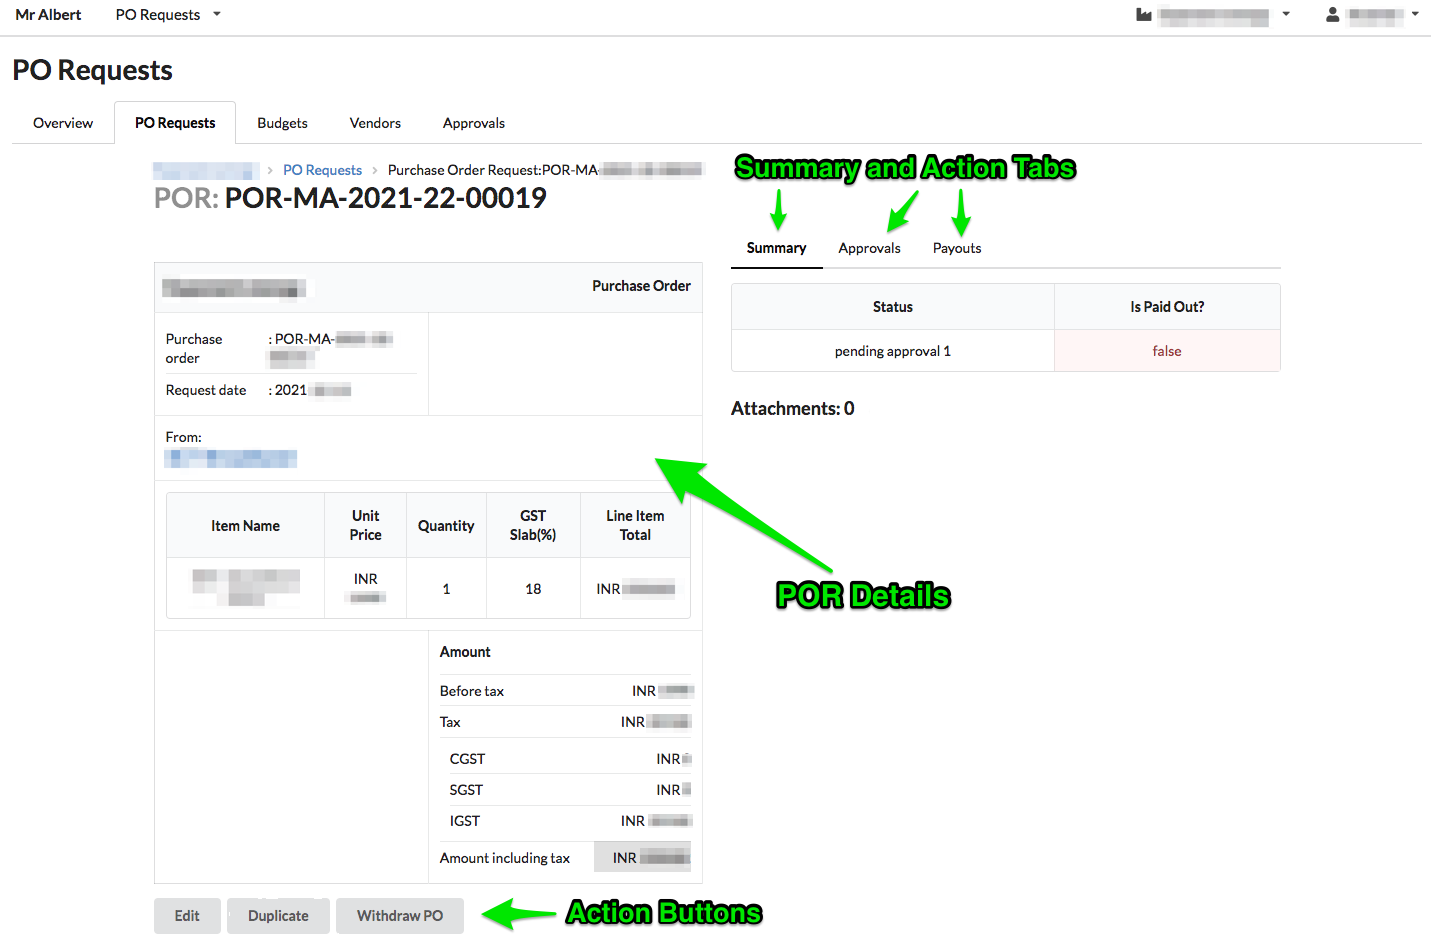
The POR Details page displays all details of a particular POR along with:
- a Summary tab that displays the particular POR's Approval and Payout statuses and any attachments added to the POR (quote/purchase invoice etc.)
- an Approvals tab that shows the approval status and from where Approvers can navigate to the POR's approval page,
- a Payouts tab that shows the payout status and from where Payouts can be issued,
At the bottom of the POR details, there are three buttons:
- Edit - to edit the details of the POR
- Duplicate - to duplicate the POR
- Withdraw PO - to withdraw the POR
In detail
1. Summary tab
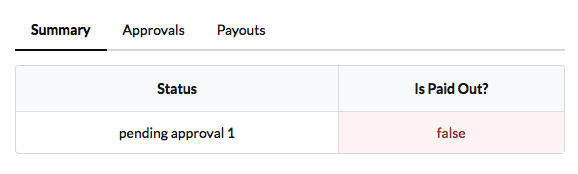
The Summary tab displays two statuses - the current status of the POR and whether the Payout has been made - and also any attachments that were added to the POR.
Status
- Information in this column reflects the current approval status of the POR from the four possible statuses -
pending approval 1/pending approval 2/approved/rejected.
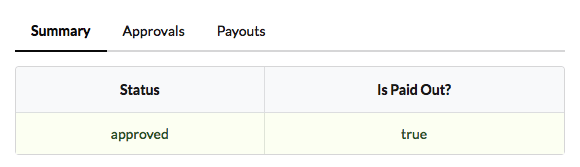
Is Paid Out?
True- a payout has been issued in reference to the particular POR.False- a payout has not been issued in reference to the particular POR.
Example 1
Example 2

Example 3
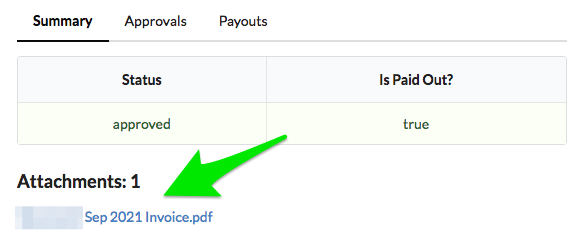
Attachments
"Attachments" is an optional field while creating a POR. If attachments are included while creating a POR, the Summary tab will show the number of attachments along with the links to view/download them.
Example
2. Approvals tab
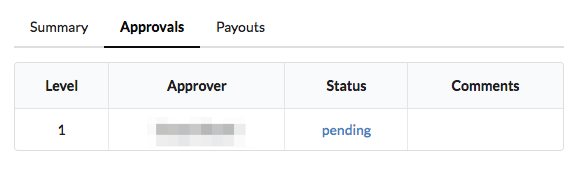
While the Status column in the Summary tab only shows the current approval status of a POR, the Approvals tab in the POR Details page shows status of approval levels along with additional information such as Approver names and Comments (if any).
Level
- Shows the Approval level number -
1for L1,2for L2 etc.
Approver
- Shows the name of the corrensponding level's Approver.
Tip: Approvers for the different approval levels are set in a Budget's details. Also, different Budgets can have different Approvers. To learn more about setting Approvers, refer to Create or Edit a Budget.
Status
- Shows the status of the corresponding approval level -
pendingorapproved - For PORs with
pendingstatus, Approvers can click onpendingto quickly navigate to the Approval page where they can approve or reject the POR.
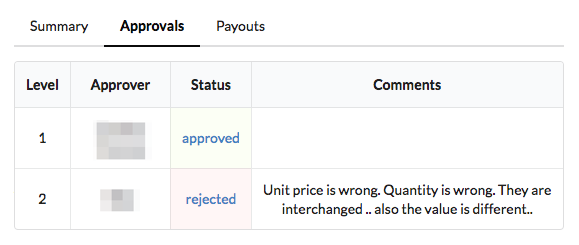
Comments
- Displays any optional comments entered by the Approvers.
Example 1
Example 2

Example 3
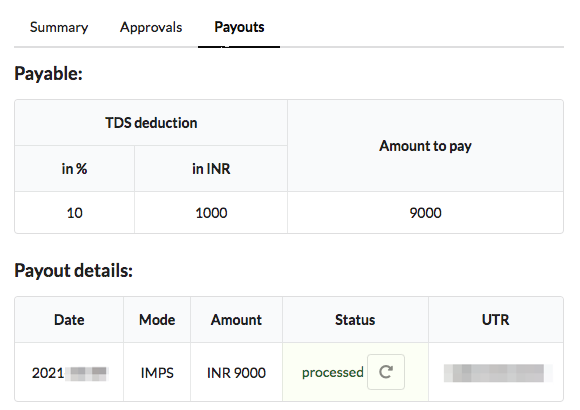
3. Payouts tab
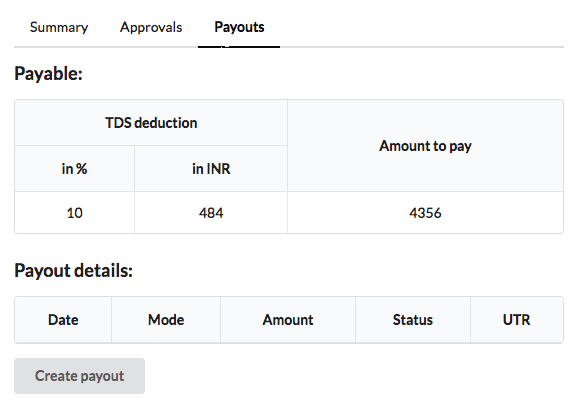
This is where payouts are issued. The Payouts tab displays the final amount to be paid out along with details of deductions such as TDS. For approved PORs where no payout has been issued yet, a payout can be made by clicking the "Create payout" button. For PORs where a payout has already been made, the details of the payout will be shown in the "Payout details" table.
Payable:
- TDS deduction
-
"in %" - shows the TDS percentage applicable to the Vendor. This detail is fetched from the TDS category selected for a Vendor while creating the Vendor. To learn about changing the TDS category and all details pertaining to a Vendor, refer Create or Edit a Vendor
-
"in INR" - shows the TDS amount calculated based on the TDS percentage.
-
- Amount to pay
- Shows the final amount to be paid out after deductions.
Payout details:
- If no payout has been made
- The table will be blank.
- Clicking the "Create payout" button will immediately trigger a payout from the RazorpayX (or other payment processor) account integrated with your Mr.Albert POR account.
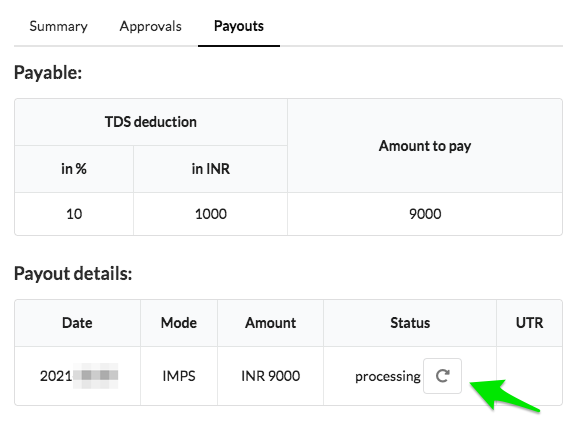
- When a payout has been made
- "Date" - shows the date when the payout was made.
- "Mode" - the mode by which the payout was made.
- "Amount" - the amount that was paid out.
- "Status" - the status of the payout.
- The status will be displayed as
processingimmediately after a payout has been made by clicking on the "Create payout" button. - Clicking on the "refresh" icon near
processingwill update the payout status asprocessed. This step will also fetch the UTR number of the payout transaction from the payment processor account and display it in the table.
- The status will be displayed as
- "UTR" - the UTR number of the payout transaction, displayed when payout status is
processed.
Example 1 (No payout has been made)
Example 2 (Payout is issued but Status has not been refreshed)
Example 3 (Payout is issued and the Status is updated along with the UTR number)
4. Edit, Duplicate, Withdraw PO buttons
Below the POR details, there are three action buttons.
- The "Edit" button takes you to the page where you can make changes to a POR.
Refer to Create or Edit a POR for details on editing a POR
- The "Duplicate" button creates a new POR with the same details of the particular POR being viewed.
Refer to Duplicate a POR for more details
- The "Withdraw PO" button marks the POR as withdrawn and removes it from the list of PORs pending approvals. Refer to Withdraw a POR for more details